Showing posts with label Digital picture frame. Show all posts

Tuesday, January 13, 2015

Getting your local IP address in the GNU Screen status line

So I have this Digital Picture Frame made from an old laptop at work. It doesn't have that many uses other than to amuse myself and others in the form of a music player and an overpowered clock.

When I use it as a music player I use GNU Screen and Camp, the latter in combination with cp437 of course. This gives me the ability to log in remotely from my work computer to change track, volume and whatnot. The problem is having the correct local IP address of the machine since it gets updated every 8 hours. First I wrote a script that will check the local IP and send me an e-mail with the new one if there has been any changes. I run this script via cron once an hour.

But what I really wanted was to have it display in the status line of GNU Screen. It took some digging but I found this article which mentions an option called "backtick" in GNU Screen. In short backtick allows you to run a command from .screenrc and have it's output displayed in the status line.

An almost 20 year old laptop chugging along on Debian Wheezy playing
music and pulling of a look that might induce wet dreams to retro nerds.  

How to do it

I've added the following to my .screenrc
backtick 101 600 600 hostname -I

101 is the identifier of this particular backtick that will be used in the status line string, it could just as well be 1 or whatever number I choose.
600 and 600 determines how often to run the program and how often to refresh the line. I use the same number on both mainly because that's what the author of the article did and I don't see any reason to go beyond that. If you're curious read more about it here.
hostname -I this is the command I run to get my local IP address.

That's it for the command but you need to add want to display the output in the statusline:
hardstatus alwayslastline "%{= g} %{= w}%-Lw%{=r}%n%f* %t  %{-}%+LW %-=%| %101` | %D %M %d %Y %c:%s"

So really I just added %101` (yes the ` is required) to the string in order to display the output. That and two | and a couple of spaces to act as dividers.   

Now don't come around asking me questions on GNU Screen's status line because that is a whole other story. I barley know what mine does. 
Tuesday, March 12, 2013

Shutdown Linux nicely with a USB stick the right way

Forget everything I wrote in my previous post. Like Andrew pointed out in the comments on my youtube video and the blog, running a cron job every minute isn't really optimal. There is a better way to do it.


The fun part is that it doesn't require autofs since it uses udev rules and can find out the id of a USB stick (or any other device I guess) upon connection instead of going through the mounting process. At the same time it also manages quite nicely renders my script obsolete since you can issue "shutdown -h now" directly. Oh, did   mention it's A LOT faster. 

Well enough with the talk here's how you do it: 

Find out the vendorId and productId of your USB stick: 
$ lsusb
Here's my output, the numbers you want are the ones after "ID" the first one is the vendorId and the latter productId:
Bus 001 Device 003: ID 0781:7114 SanDisk Corp. Cruzer Mini
Bus 001 Device 001: ID 1d6b:0001 Linux Foundation 1.1 root hub

Then create an aptly named file in: /etc/udev/rules.d/ I went with: 100-usb-device-action.rules 

Then add the following line, just substitute your vendorId and your productId
ACTION=="add", ATTRS{idVendor}=="0781", ATTRS{idProduct}=="7114", RUN+="/sbin/shutdown -h now"

That's it! Your done. Insert that USB device and watch your system shutdown in a nice way. 

Sunday, March 10, 2013

Shutdown Linux nicely with a USB stick

PLEASE NOTE

This post is sort obsolete since there is another way to shutdown linux nicely that requires less of everything. You can read about it here. However maybe you came for the script that looks for a file and issues a command. Well then you're in the right place, just scroll down a bit.

Shutdown Linux nicely with a USB stick

If I had such a thing like a following from regular readers you would probably know about my ancient Toshiba Satellite 320CDS laptop that now serves as a digital picture frame. The only problem is to have it shut down properly.

Why is that a problem you ask?
Well, I can't use the power button as it just cuts the power and I risk getting disk errors that most likely forces me to hook up a keyboard on the next boot. Something that I rather avoid.
But I can do it via a ssh connection. However that requires a working network connection and another device. That leaves me with the option I'd rather avoid. Connecting a keyboard and manually shutting the system down. Ok, not the end of the world but it's a bit tedious to have to drag out a keyboard each time I want to do a shut down.


My solution for this is a script that checks if a certain file is present in a defined directory. If the file is present the script issues the "shutdown -h now" command. The physical part of this is that the file is contained on a USB stick that when inserted automounts to a certain location. By running the script from root's crontab I now have a way to make Linux shut down nicely without a working network connection or keyboard.

Howto: Shutdown Linux nicely with a USB stick 

So what is needed for this to work? Well first of all here's my script. It's not very complicated and you should be able to tailor it according to your needs. Perhaps you want to run a slideshow with the pictures on a USB stick when inserted or maybe even completely wipe your system.

The next step is to make a USB stick automount in a certain directory.
For this we need to install autofs. There's good tutorial on this here and here, but I'll give you the basics below.

Since I run debian installation is as easy as:
$ sudo apt-get install autofs 

To configure autofs I started by adding this line to /etc/auto.master
/media   /etc/auto.removable     --timeout=2

Then I added this line to /etc/auto.removable
usb-shutdown -fstype=ext2 UUID=UUIDOFYOURDEVICE

The UUID is the Universally unique identifier of a disk. In this case we use it as way to know what USB stick to mount in /media/usb-shutdown/
You can find out the UUID of your device with:
$ ls -la /dev/disk/by-uuid/ 

This will give you a list of your devices with symlinks pointing to their labels i.e /dev/sda1 etc. Alternatively you could run the following command, substituting /dev/sda1 to your device.
$ sudo blkid /dev/sda1

Finally to make autofs recognize your changes run:
$ /etc/init.d/autofs restart

Last but not least we have to make the script run at a certain interval. This is done via the cron daemon. To edit root's crontab type following, if you want to edit the current user's crontab just omit the "sudo":
$ sudo crontab -e

Add the following lines:

# Check if USB device with "systemHaltNow" is present
  * *   *   *   *    /PATH/yourscript.sh >/dev/null 2>&1

The stars tell cron to run the script once every minute forever and ever and ever. The last part stops cron from e-mailing you and logging everytime it executes the script, more info on that here.

Well that's it.

Wednesday, January 6, 2010

How to start Kazehakase in full screen mode

The long story:
I've been thinking about changing my Digital Picture Frame / Twitter frame to use/be browser instead. Partly to be able to get a useful outlet while practicing PHP-coding but also to be able to use services such as Twitter and Tom Scotts Star Wars weather.

My browser of choice is Kazehakase, a small foot print browser that can use either the Webkit or the Gecko rendering engine. It can handle alot more than Dillo but uses way less resources than Firefox. I found out about Kazehakase while reading the blog of K. Mandla.

However there is a problem. Kazehakase is not a very well documented browser. In it's manual there is a reference to using "Actions" with the browser, but the actions themselves aren't documented. Luckily enough I found out how to start Kazehakase in full screen mode by some trial and error.

The short story:
kazehakase -a "ToggleFullScreen" your_url_here

Tuesday, October 20, 2009

Twitterframe

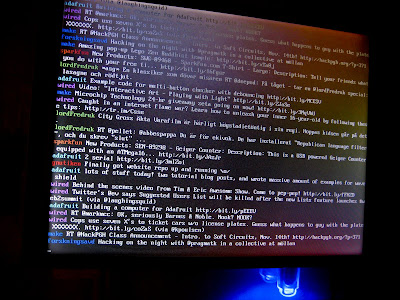
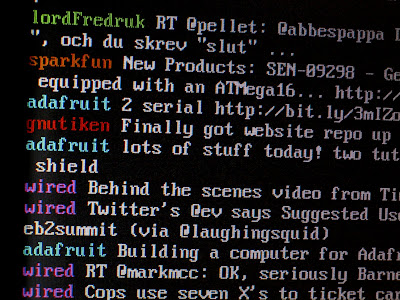
I got kind of bored of my digital picture frame, like i normally do when a project is finished. So I wanted to do something else with it. One of the things I wanted to try to use was the command line interface instead of X. The idea was to get some nice scrolling text on the screen. An IRC-frame sounded like a nice idea until I realized I really want the system to be automatic and since IRC sometimes requires you to interact I decided to go with twitter instead.

I surfed around and found that PTT (Python Twitter Tools) seemed to be what I needed. To install PTT in Debian (I guess the same goes for all other debian derivatives like Ubuntu and so on) you first need to install the packages python-twitter and python-setuptools, and their respective dependencies.
To do this simply type the following in a console/terminal:
sudo aptitude install python-twitter python-setuptools

Then install installed PTT with:
sudo easy_install twitter

Now it's just a matter of either using the proper command line options to get PTT to do your bidding. To get an idea of what you can do simply type:
twitter -h

Since I like config-files I created one in my home dir called .twitter (this also happens to be the default config file PTT looks for. This is what my .twitter file contains:

[twitter]
email: myemailadress@someplace.com
password: mytwitterpassword
format: verbose
format: ansi

The email and password options are pretty self explanatory if you have a twitter account. Format however is the way twitter presents itself on your screen.
format: verbose | Prints out the full twitter post rather than just one line as per default.
format: ansi | Uses ansi coloring on the different usernames.

Since .twitter contains your password it can be a good idea to only allow your user to read it:
chmod 400 .twitter

Now that I had PTT working the way I wanted I simply added "twitter -r" to my .bash_profile to have it automatically launch after my system boots up. The "-r" causes PTT to continue running and updating the twitter feeds every five minutes.


Tuesday, September 22, 2009

Determine if user is logged in remotely or locally

Since I do all the maintenance on the digital picture frame via ssh I don't want the same login scripts to run when i log in remotely as when I log in locally. Well to be more specific I don't really log in locally but the user I have created logs in automatically when the DPF is turned on and from there on a number of things start. Needless to say I don't need to run "startx" everytime I log in via ssh.

So I wrote a small script to help me determine whether or not I was logged in locally or remotely (via ssh). The script is in its bare form here, I use it in my .bash_profile but you might find another use for it.

Important note: This script doesn't really determine if a user is logged in locally or remotely but rather using a tty or pts although the latter usually means that the user is logged in remotely, but not always. ;)
#!/bin/sh

#
# tty-vs-pts.sh
# tty vs pts checker by Markus Ulfberg 2009-09-22
# Inteded use is running different scripts wether
# the user logs in remotely or locally.
#

# Get the name of the tty the user is on.
FULL_USER_TTY=`tty`
# strip everything but tty or pts from the string that "tty" produces.
USER_TTY=${FULL_USER_TTY:5:3}

# Check if it is tty or pts.
if [ $USER_TTY == 'tty' ]
then
echo "You are logged in locally using: $FULL_USER_TTY"

else
if [ $USER_TTY == 'pts' ]
then
echo "You are logged in remotely using: $FULL_USER_TTY"
else
# Return failure if it is neither.
echo "Failed to establish type of tty"
fi
fi


Formatted for blogger using: formatmysourcecode.blogspot.com

Monday, May 18, 2009

Backing up a system on Compact Flash

If you have a system on Compact Flash, for instance a digital picture frame. There's a really neat way to work on the system without having to write to the disk more than once, and still do alot of updates or other changes.

What you do is that you make a disk image of the Compact Flash media and then run that image in a machine emulator like Qemu for Linux and Windows or Q - [kju:] for OSX. Once the image is booted you can, work on the system and do all sorts of changes and when you're done all you have to do is write that image back to the media it came from. Ofcourse, if you're only doing minor changes this might be unecessary but for bigger system updates or just testing out new software before going live it's really nice.


How it's done
  1. Hook up your CF-card to your host system make sure the disk is not mounted, unmount it if necessary. But before doing that find out the path to the disk i.e: /dev/sdb, /dev/hdb or something like that.

  2. Then run dd to copy the whole disk to an image.
    Warning!
    The dd command can cause irreversible damage to your system. If you're not sure what you're doing, don't do it.

    Syntax: dd if=path_to_disk_to_backup of=outfile
    Where
    if stands for "Input file" and of for "Output file"

    For my system I use the following command:

    dd if=/dev/sdb of=lappy586.bin conv=noerror,sync
    The added option
    conv=noerror,sync makes sure that the copy will go on even if there are errors.
    The copy might take a while depending on the size of the image you try to copy.

  3. After the copy is done you can run the image with qemu like this:
    qemu -hda path_to_diskimage

    Qemu has alot of options, if things don't work out for you the first time have a look at the manpages and other documentation. I got lucky and had everything working without any need for extra configuration when running Qemu from Debian but not so lucky when trying to run the same image from Windows Vista.

  4. Finally, to write the backup back to disk just reverse the paths in the dd command:
    dd if=lappy586.bin of=/dev/sdb conv=noerror,sync

Saturday, May 9, 2009

Converting the Toshiba 320CDS to a digital picture frame


Inspired by the many digital picture frame tutorials online I decided to make one myself.
First I jotted down some goals:
  1. Use a minimal amount of hardware and achive total silence.
    Solution: Strip away, speakers, battery, CD- and floppy drive. Instead of the hard drive use a Compact Flash card with a CF-IDE bridge.
  2. Use a minimal amount of wires.
    Solution: Use wireless networking.
  3. Design with a thin and flat formfactor.
    Solution: Mount everything between two sheets of transparent polycarbonate or acrylic glass (plexi glass).
  4. Run without keyboard or mouse.
    Solution: Remote control via ssh and/or vnc.
  5. Easy power up/down via the power button.
    Solution: Autologin in console and run X and other stuff from .bash_profile
    Problem: Since the Toshiba 320CDS uses an APM BIOS it cannot read events on the power button. In other words it cannot power down nicely using the power button. Any ACPI BIOS would be able to.
  6. Display a slide show of images.
    Solution: Use Feh, a very capable lightweight image viewer.
  7. Lenghten the life of the CF card by minimising disk writes/reads after boot.
    Solution: Do not use swap on the CF card, store images online, configure the system to report less.
  8. Display a Pong Clock.
    Solution: Use the pong xscreensaver.
    Problem: Won't run smoothly @233 MHz

Install a minimal debian installation
  1. Follow this excellent tutorial: wiki.dennyhalim.com/debian-minimal-desktop-installation

Additional Debian packages to use
  • Remote control with: ssh and x11vnc
  • Disable screen blanking in x: x11-xserver-utils
  • Wireless support: wpasupplicant wireless-tools
  • Image viewer: feh
  • Remove the mouse cursor: unclutter
  • Mount any ftp/sftp/... as local directory: curlftpfs

Set up wireless networking with 3Com Office Connect 11g PCMCIA

  1. Download the correct firmware from: prism54.org
  2. Install the packages wireless-tools and wpasupplicant
  3. Follow this excellent tutorial: http://ubuntuforums.org/showthread.php?t=318539
  4. To use multiple networks, use the following configuration to activate roaming mode:
    • Edit /etc/network/interfaces:
      allow-hotplug wlan0
      auto wlan0
      iface wlan0 inet manual # this has to be set to manual, dhcp configuration is done later
      wpa-driver wext
      wpa-roam /etc/wpa_supplicant/wpa_supplicant.conf
      #id_str="[NAME_OF_NETWORK]" is the identifier that corresponds to the network configuration in wpa_supplicant.conf
      iface
      [NAME_OF_NETWORK] inet dhcp

    • Create a /etc/wpa_supplicant/wpa_supplicant.conf containing:
      ctrl_interface=DIR=/var/run/wpa_supplicant GROUP=netdev
      network={
      ssid="[YOUR_SSID]"
      scan_ssid=1
      psk=[YOUR_PRESHARED_KEY_IN_HEX]
      key_mgmt=WPA-PSK
      pairwise=TKIP
      group=TKIP
      id_str="[NAME_OF_NETWORK]"
      }

Autologin in debian without starting x first

Follow one of the two examples here: www.debianadmin.com/how-to-auto-login-and-startx-without-a-display-manager-in-debian.html


Starting X after autologin:
  1. Add startx to .bash_profile

Set up and use curlftps after autoloing:

  1. Add your USER to the group fuse:
    sudo adduser USER fuse
    For this to activate you have to log in again, the easiest way to do this is:
    su USER
  2. Mount your remote directory by adding this line to .bash_profile:
    curlftpfs -r -o user=FTPUSERNAME:FTPPASSWORD FTPURL DIRTOMOUNTIN
  3. If you ever have to unmount the directory you can do this with umount as root or with fusermount -u as a user.

Start remove mouse cursor and start slideshow after starting x:

  1. Add these lines to ~/.config/openbox/autostart.sh:
    unclutter &
    feh --full-screen --randomize --auto-zoom --slideshow-delay 10 /home/makkan/images/ &

Disable screen blanking:

  1. First of all make sure the bios doesn't blank the screen.
  2. Add these two lines to .bash_profile:
    setterm -blank 0
    setterm -powersave off
  3. Edit /etc/console-tools/config
    Change this line: BLANK_TIME=30
    To: BLANK_TIME=0
  4. In your ~/.config/openbox/autostart.sh add these lines:
    xset -dpms &
    xset s off &
    xset s noblank &


Reduce disk writes

  1. If you have to use swap to get things working set it to minimal use by editing: /etc/sysctl.conf
    Add the line: vm.swappiness=0
  2. In /etc/sysctl.conf also activate laptop mode by adding the line:
    vm.laptop_mode=5
  3. Activate your new configuration by typing: sudo sysctl -p
  4. Rsyslog writes a MARK every 20:th minute, disable this by editing /etc/default/rsyslog and set:
    RSYSLOGD_OPTIONS="-m 0"
    Restart rsyslog with:
    sudo /etc/init.d/rsyslog restart
  5. Cron writes a report every hour/day/week and so forth. Disable this by editing:
    /etc/crontab