Since my daughter comes from a long line of droppers her Lucia candle didn't get much mileage before she dropped it and broke the glass bulb. Glass bulb you say, yes. These hand held electric candles haven't seen much product development in the last thirty years or so.
Lucia is a typical Swedish holiday that combines our favourite pastimes mys* and fika**. Usually it's celebrated by a Lucia train err... a better translation would probably be Lucia procession.
* Mys: activity that makes you feel all warm an fuzzy inside i.e. cozy ** Fika: Eating various types of buns and cookies while consuming either coffee, tea or other seasonal beverage.
Anyway as I was picking up the shards I wondered why they didn't use LEDs for kids candles. But a manufacturers apparent failure to satisfy its customers is a perfect reason for a maker to take things into her or his own hands.
But just using a LED wouldn't be very fun, no we definitely need more awesomeness!
Circuitry
Below is the circuit I designed for this project. It's really simple but I did run into some problems when I realized the ATtiny85 only has 2 PWM outputs. Turns out I was wrong it actually has 4 PWM outputs but two of them share the pin with analog input. Since no input is used in this project that wasn't a problem at all.
Please note: There is one major flaw with my circuitry. I calculated the resistors using the 5V output voltage on the Arduino board. Since this is meant to be powered from standard 1.5V button cell batteries it is far from ideal preferably I should have calculated the resistors for 4.5V. However it actually does work with as low as 3V but the colors are a bit off and dim.
Simple circuit using the ATtiny85 microcontroller, an RGB LED and some resistors.
Breathing life into a flame
Ok, so we have the circuit down, now we need some code to run on the microcontroller. I've written a very short code snippet which uses simple randomness to create a flickering effect. Since there are differences in LEDs you might have to fine tune it according to your hardware, however it should be a pretty simple job as the code is pretty much self explanatory and commented where needed.
/*
  Flickering Candle
  Emulates a candle flickering with a RGB LED
  By Markus Ulfberg 2013-02-01
  Updated: 2014-11-24

  Uses ATtiny85

*/

// Depending on your board, comment out either the ATtiny85/Arduino
// pin variables below.

// LED pins Arduino Board
// int ledRed = 3;
// int ledGreen = 5;
// int ledBlue = 6;

// LED pins Attiny85
int ledRed = 0;  // Chip pin 5
int ledGreen = 1; // Chip pin 6
int ledBlue = 4; // Chip pin 3


// LED Power variables
byte redPwr = 0;
byte greenPwr = 0;
byte bluePwr = 0;

void setup()
{
  pinMode(ledRed, OUTPUT);
  pinMode(ledGreen, OUTPUT);
  pinMode(ledBlue, OUTPUT);

}

void loop()
{

      lightMyFire();

} // END loop()

void lightMyFire() {

  // Flicker will determine how often a fast flare will occur
  int flicker;

  // set flicker randomness
  flicker = random(800);

  // Set color of fire, use a short range to make emulate the
  // smooth movement of a flame.

  // Flicker up
  // when flicker occur, the colors shine brighter
  // adding blue creates a white shine
  if (flicker > 750) {
    redPwr = 255;
    greenPwr = 55;
    bluePwr = 5;
  }

  // Flicker down
  // when flicker occur, the flame goes down in intensity
  // and towards a reddish tone
  if (flicker < 20) {
  redPwr = random(60, 70);
  greenPwr = random(5, 15);
  bluePwr = 0;

  // Main flame color
  } else {

  redPwr = random(190, 200);
  greenPwr = random(40, 50);
  bluePwr = 0;
  }
  // display Colors
  colorDisplay();

  // Set speed of fire
  // The randomness of the delay creates a more natural erratic flame
  delay(random(30, 200));

} // END lightMyFire

// Displays the colors when called from lightMyFire
void colorDisplay() {
  analogWrite(ledRed, redPwr);
  analogWrite(ledGreen, greenPwr);
  analogWrite(ledBlue, bluePwr);
}
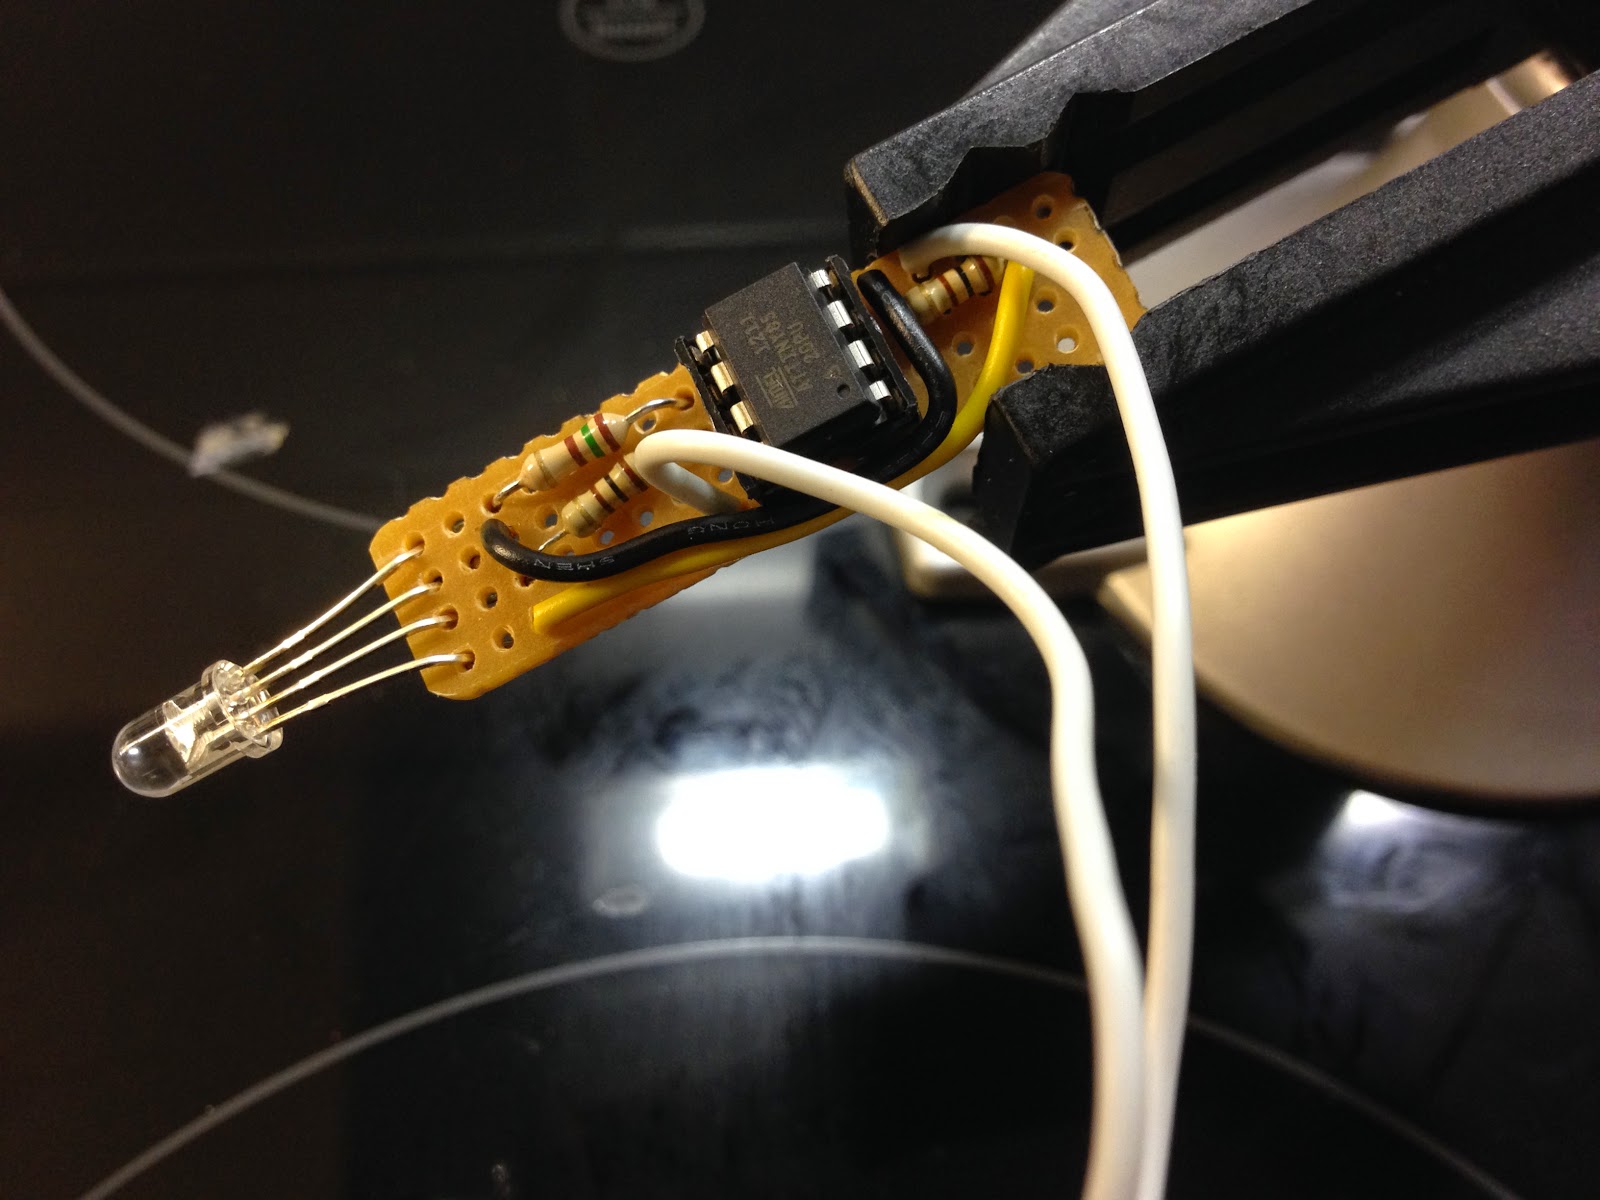
Programming the ATtiny85 using the Arduino as ISP.
Running the sketch on the ATtiny85, drawing only power from the Arduino.
Building a better candle
I've spent two years trying to make the circuit fit inside the original candle. It's not really that hard but I've restarted this project just in time to realize I won't make the deadline of Lucia and then my interest faded and I shelved the project until next year.
Last year I made this little circuit by cutting a small strip of perfboard that will fit inside the candle body.
Almost done, just need to add power.
Bottom of unfinished circuit on perfboard.
Moving on ...
Some of the main problems that I didn't solve last year was finding a good ON/OFF switch, making a suitable power pack and some sort of diffuser for the LED.
For the ON/OFF switch I decided to take easy way out and just skip it. I could always add it later if I come across a small enough SPST switch. As for power I soldered on the existing power cables from the candle to the perfboard.
Adding power connectors, using the existing ones in the candle.
Just another shot of the back of the circuit.
My power pack consists of three 1.5V LR44 button cell batteries. In order to get them to fit the cradle I just moved the spring closer to the bottom. Et voila, we have a very flimsy battery cradle. I'll probably add some plastic or something to make sure they don't rattle around when we actually use the candle.
The three batteries and the spring prior to hot glueing it into place.
Finished cradle, not pretty but it works.
Nasal spray to the rescue
Around October, I got one of the ten mandatory colds that you get during the season. I also decided to try out a new nasal spray that uses only saline. This means you can spray away as much as you like without the drawbacks of normal nasal spray abuse. It also meant that I finally found a good diffuser for the LED. The cap to the nasal spray had a nice shape of semi transparent plastic, just what I needed for my project.
Nasal spray cap used as a diffuser for the RGB LED.
This is the end ... result.
Ok, so up close the color mixing isn't really perfect. I guess we can blame either the diffuser, my code or my inability to use the correct voltage when calculating what resistor to use. But it works and hey, that's the fun part isn't it?